 Darb
DarbYour Chart of Accounts from Daftra
Export your Chart of Accounts from Daftra, prepare the required columns, and upload it to Darb.
Use this guide to export your Chart of Accounts from Daftra and prepare the CSV file for upload to Darb.
Part 1: Export your Chart of Accounts from Daftra
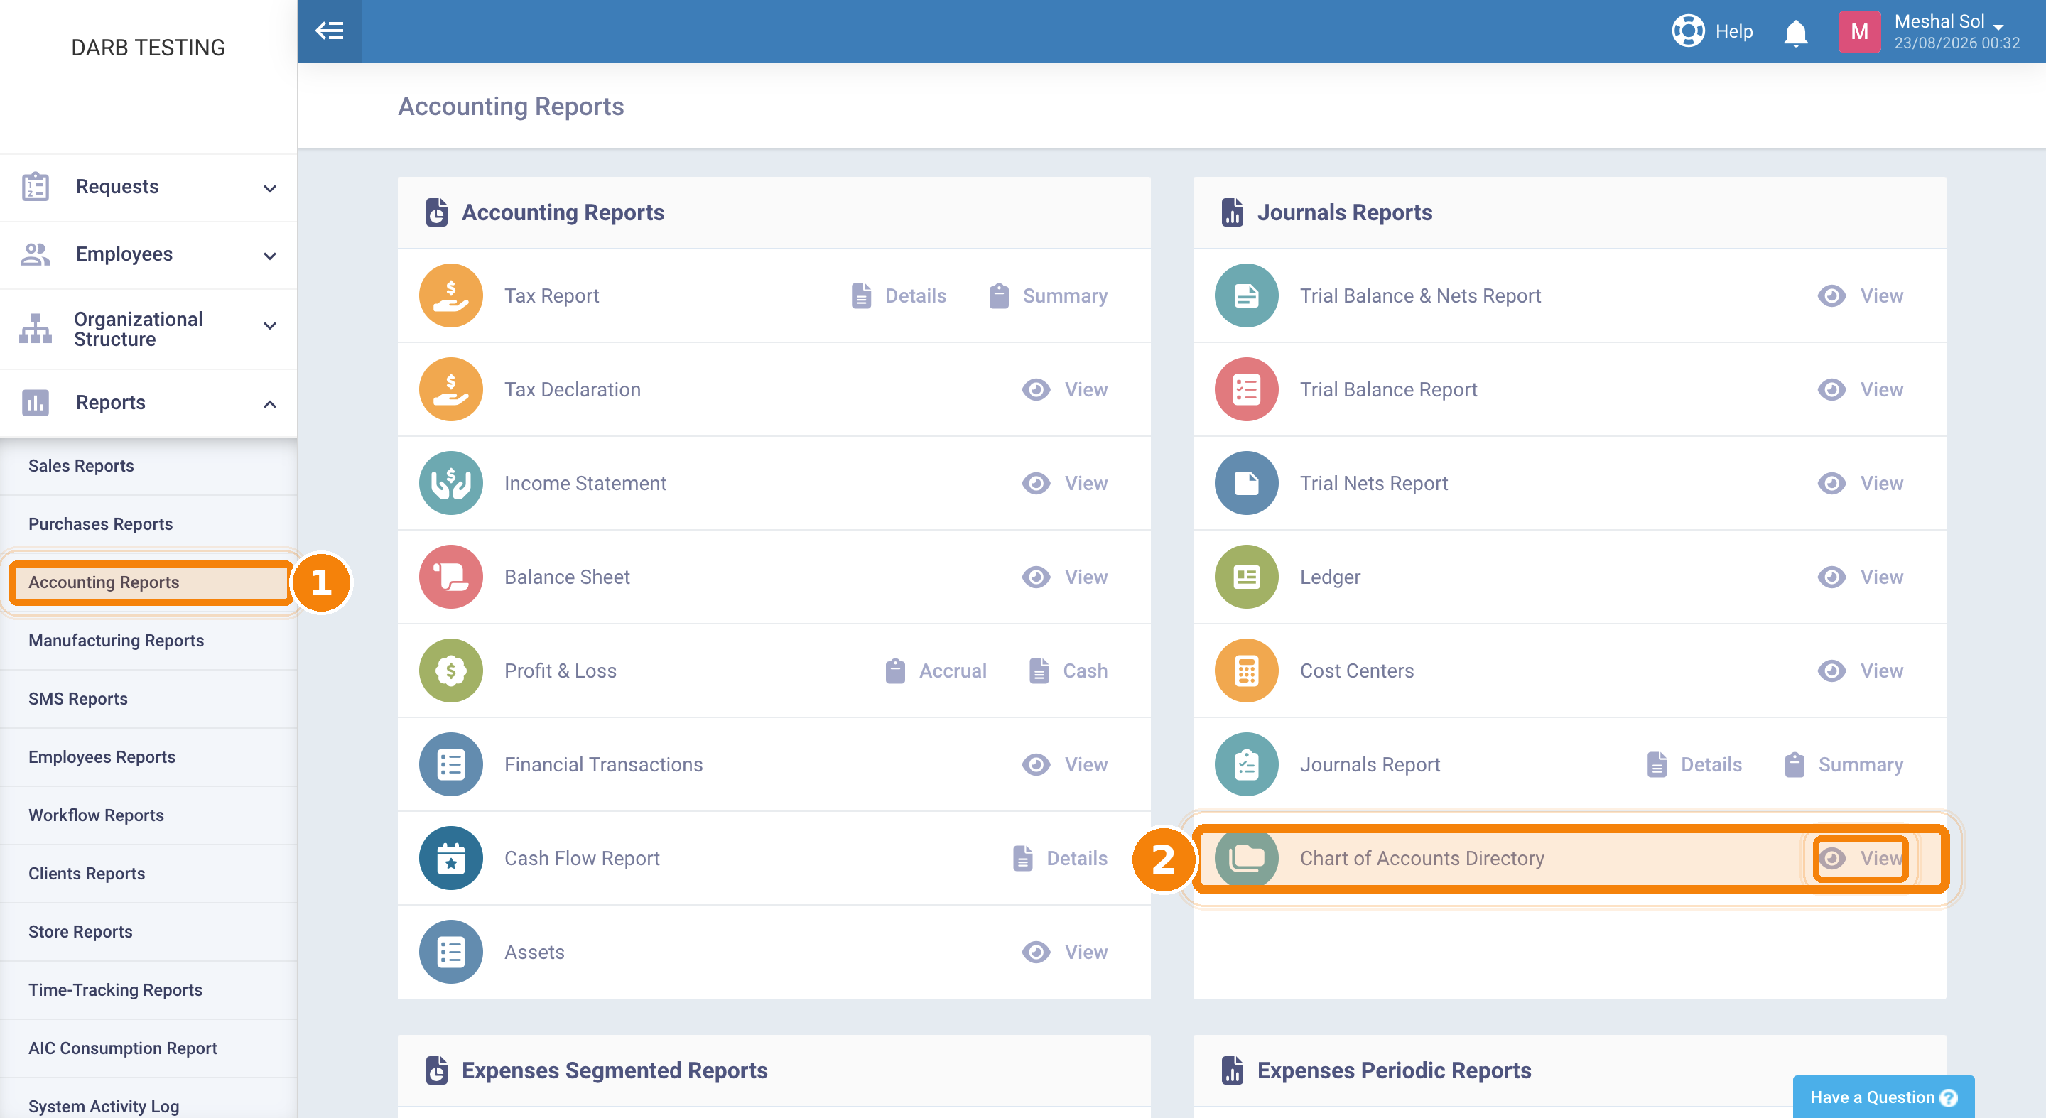
- In Daftra, open Reports, then Accounting Reports.
- Open the Chart of Accounts Directory and click View.
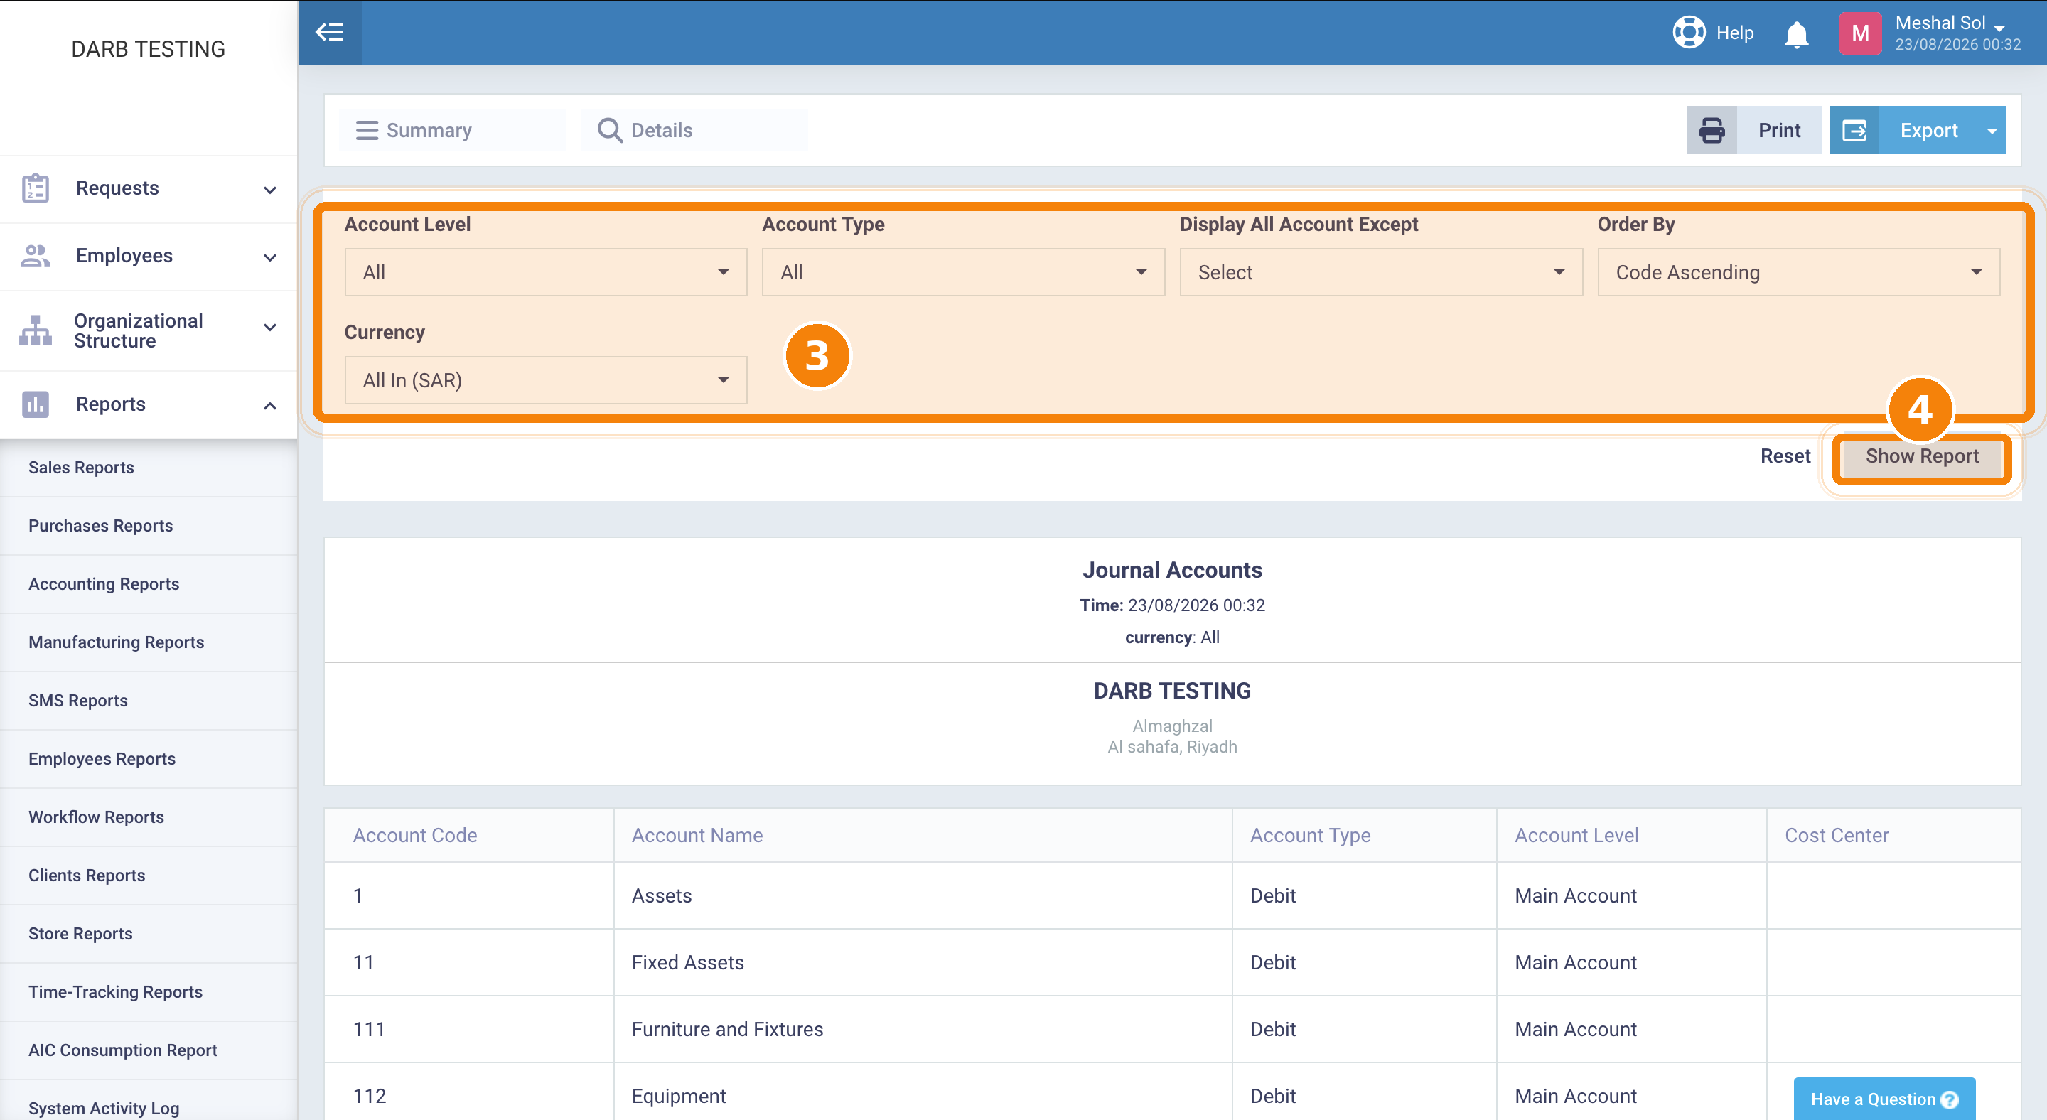
- Set Account Level and Account Type to All, select All In (SAR) as the currency, then click Show Report.
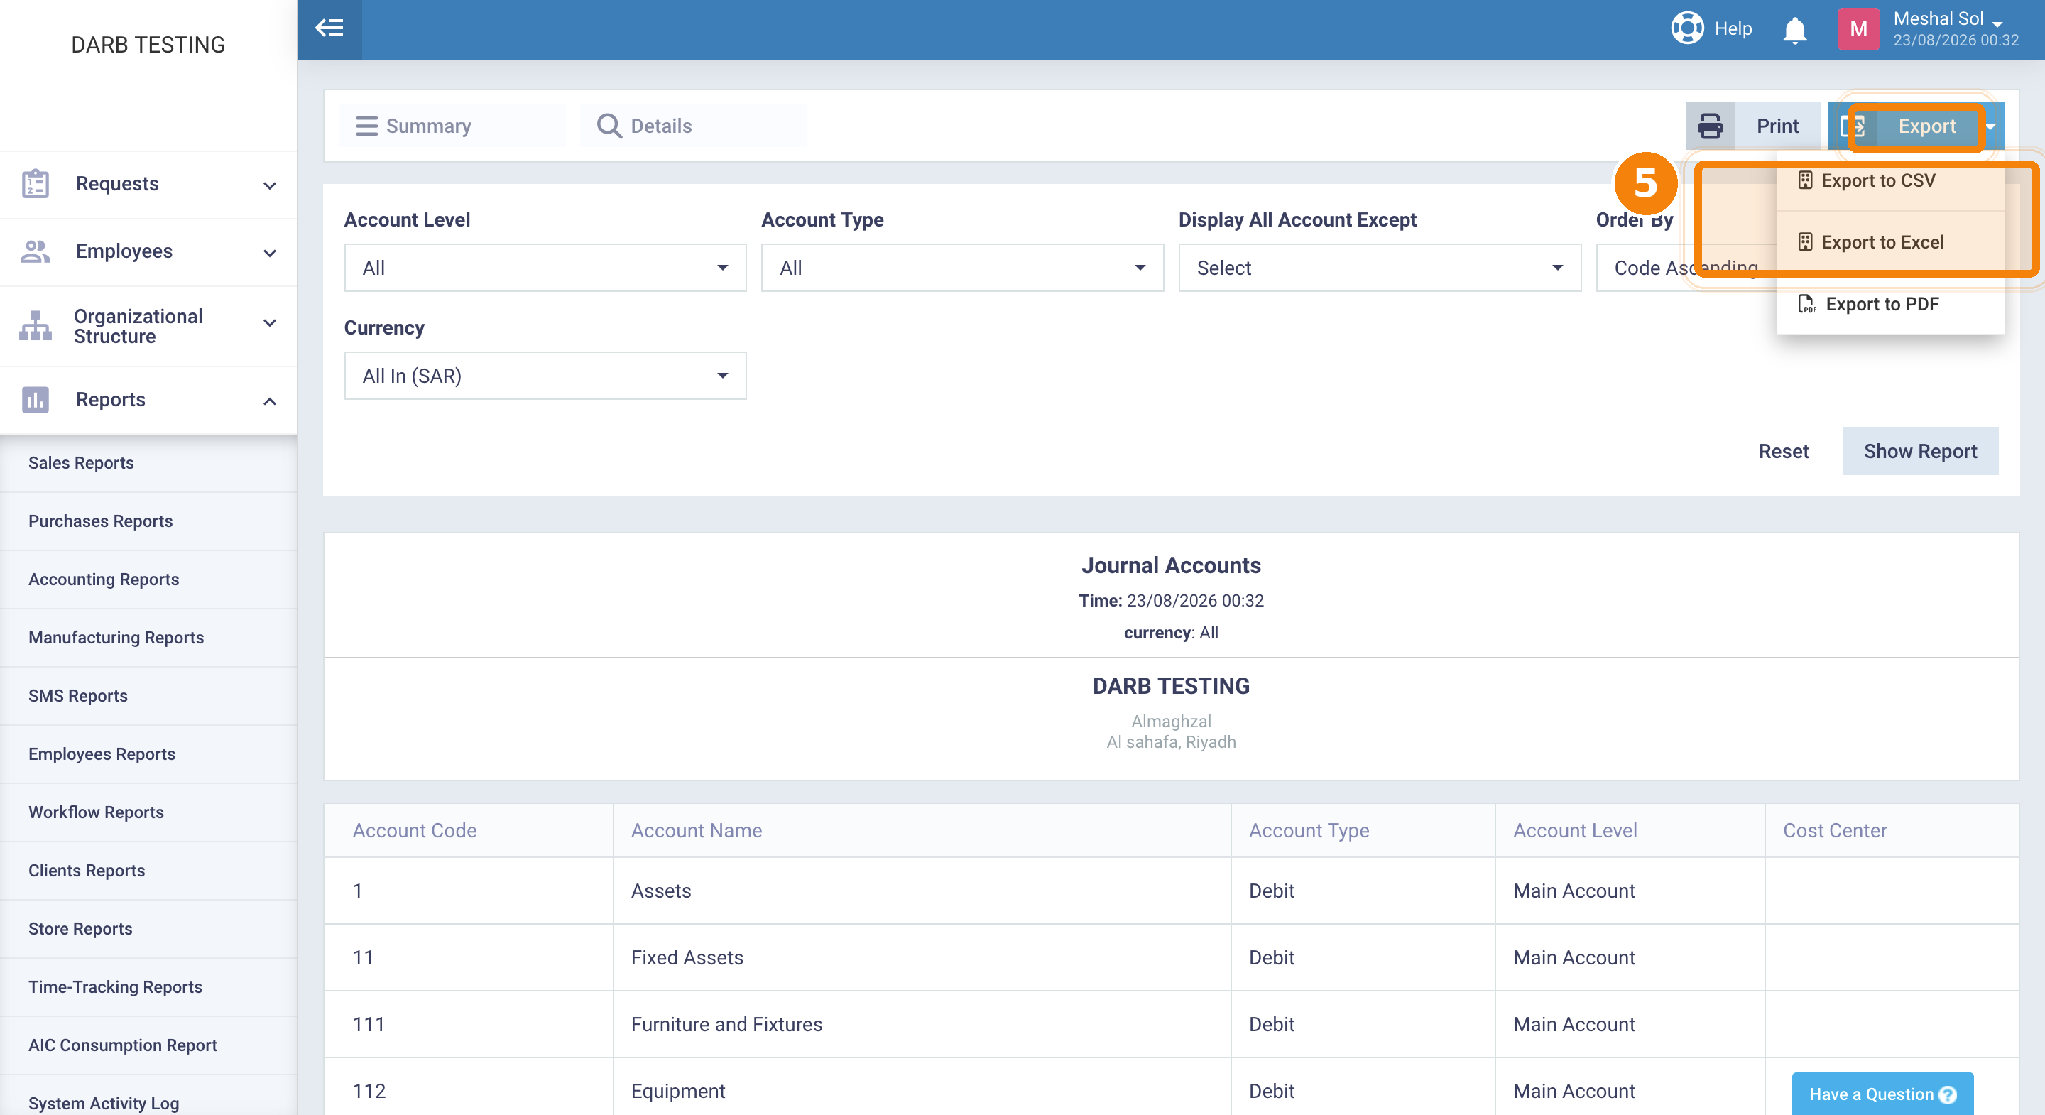
- Export the report as a CSV or Excel file.
Part 2: Prepare the file for Darb
- Open the exported file in Excel or Google Sheets.
- Keep only the Account Code and Account Name columns.
- Rename the columns to GL Account ID and GL Account Name.
- Keep every account row, including both parent/summary and detail accounts.
- Save the file as CSV.
Part 3: Upload to Darb
In Darb Accounting setup, open the Chart of Accounts step and upload the prepared CSV. Darb will show a preview and identify any rows that need attention before you confirm the upload.
Need help?
In Darb, use Contact an Accounting Expert for help uploading your Chart of Accounts and coding your first transactions.