 Darb
Employee custom fields for ERP mapping
Create employee custom fields for ERP sync: assign employee codes, departments, branches and project codes to each spender.
Use employee custom fields to prepare your Darb employee data for mapping and syncing with your ERP. An admin can create fields for the codes and classifications your ERP uses, then assign the right values to each employee—the cardholder or spender.
The fields belong to the employee profile. For example, you can store an ERP employee code, department, branch, cost centre or the project code assigned to that employee. This gives your finance team a consistent way to identify and classify each spender in your ERP.
Before you start
- Sign in as an admin to create employee custom fields.
- Identify the employee-level fields and exact codes your ERP expects.
- Decide which values should come from a controlled list and which need free text or numbers.
Step 1: Open employee custom fields
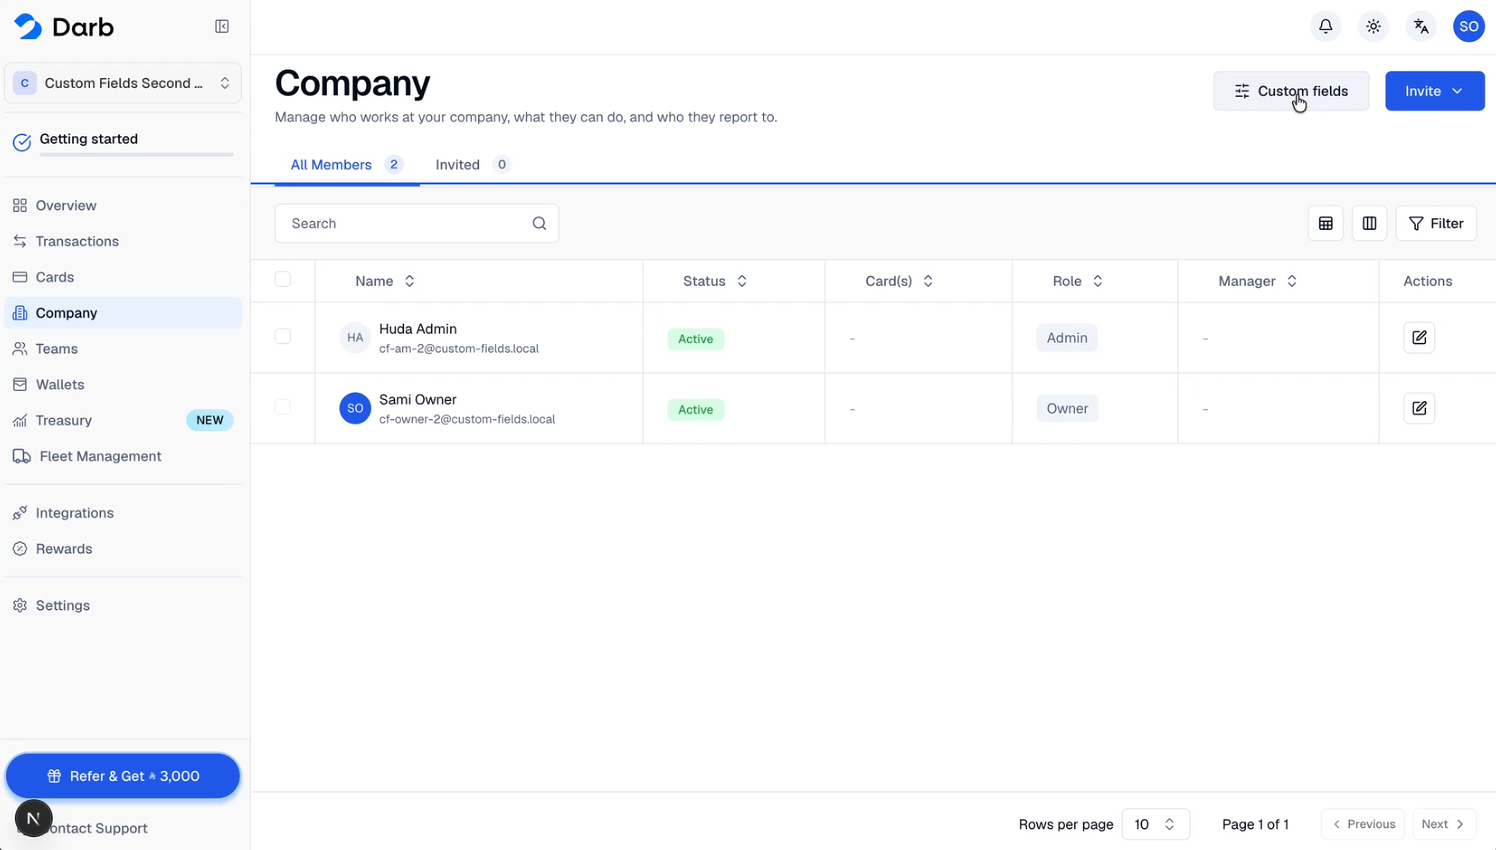
Go to Company in the sidebar, then select Custom fields at the top right. Start creating a new field to open the New field panel.
Step 2: Name the field and choose its type
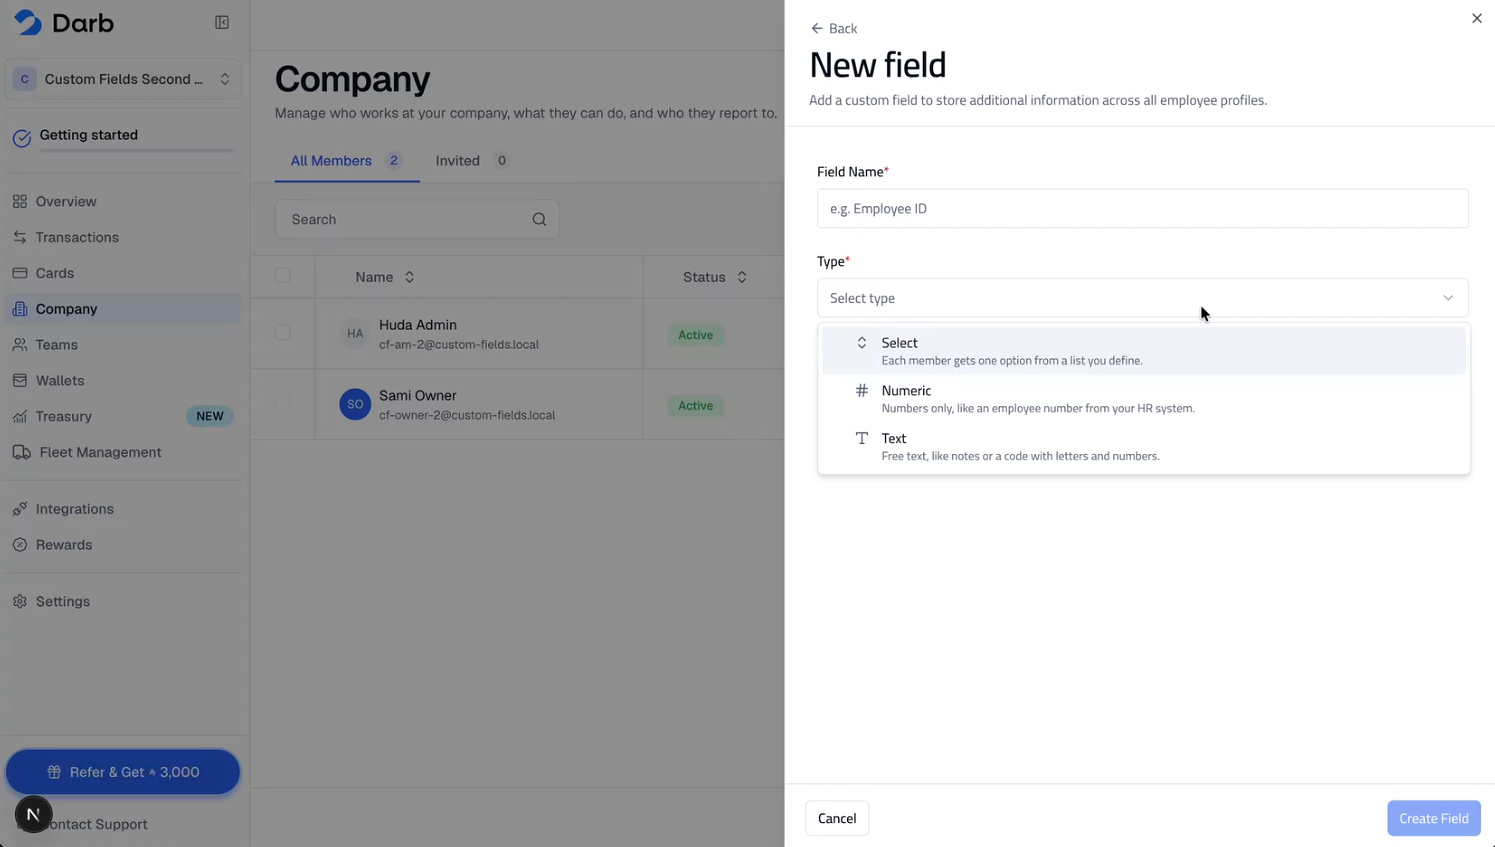
Enter a clear Field Name, then open Type. Choose the format that matches the employee data you want to map to your ERP.
| Type | How it works | When to use it |
|---|---|---|
| Select | Each employee gets one option from a list you define. | Branches, departments, cost centres or assigned projects with a fixed set of codes. |
| Numeric | Accepts numbers only. | Employee attributes that your ERP stores as numbers. |
| Text | Accepts free text, including letters and numbers. | ERP employee codes or project codes, such as EMP001. |
Step 3: Create a list field, such as Branch
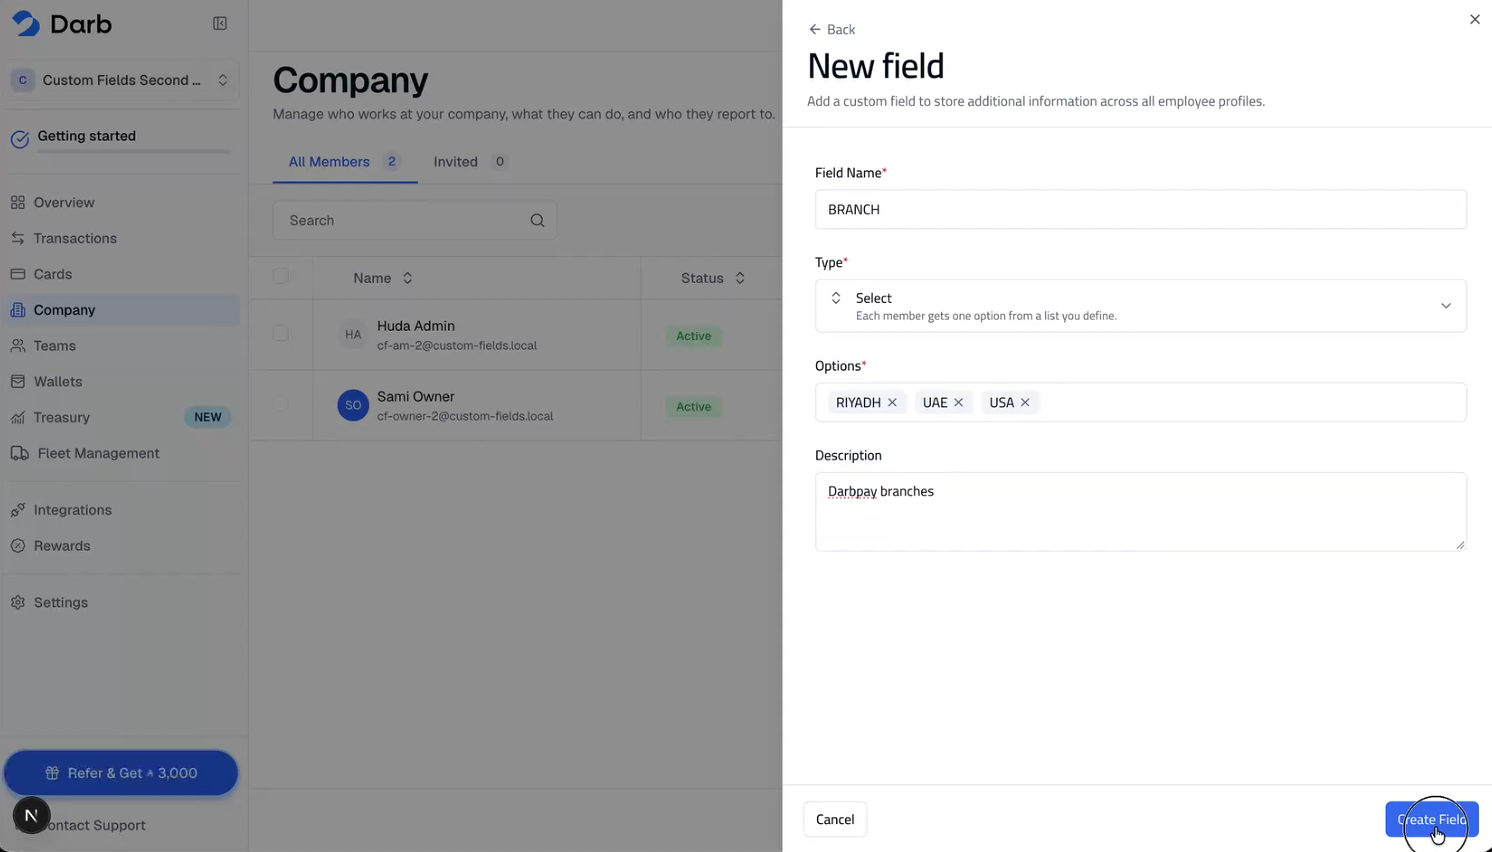
To give employees a consistent branch value, enter BRANCH as the field name and choose Select. Add the options you need, optionally add a Description to explain the field, then select Create Field.
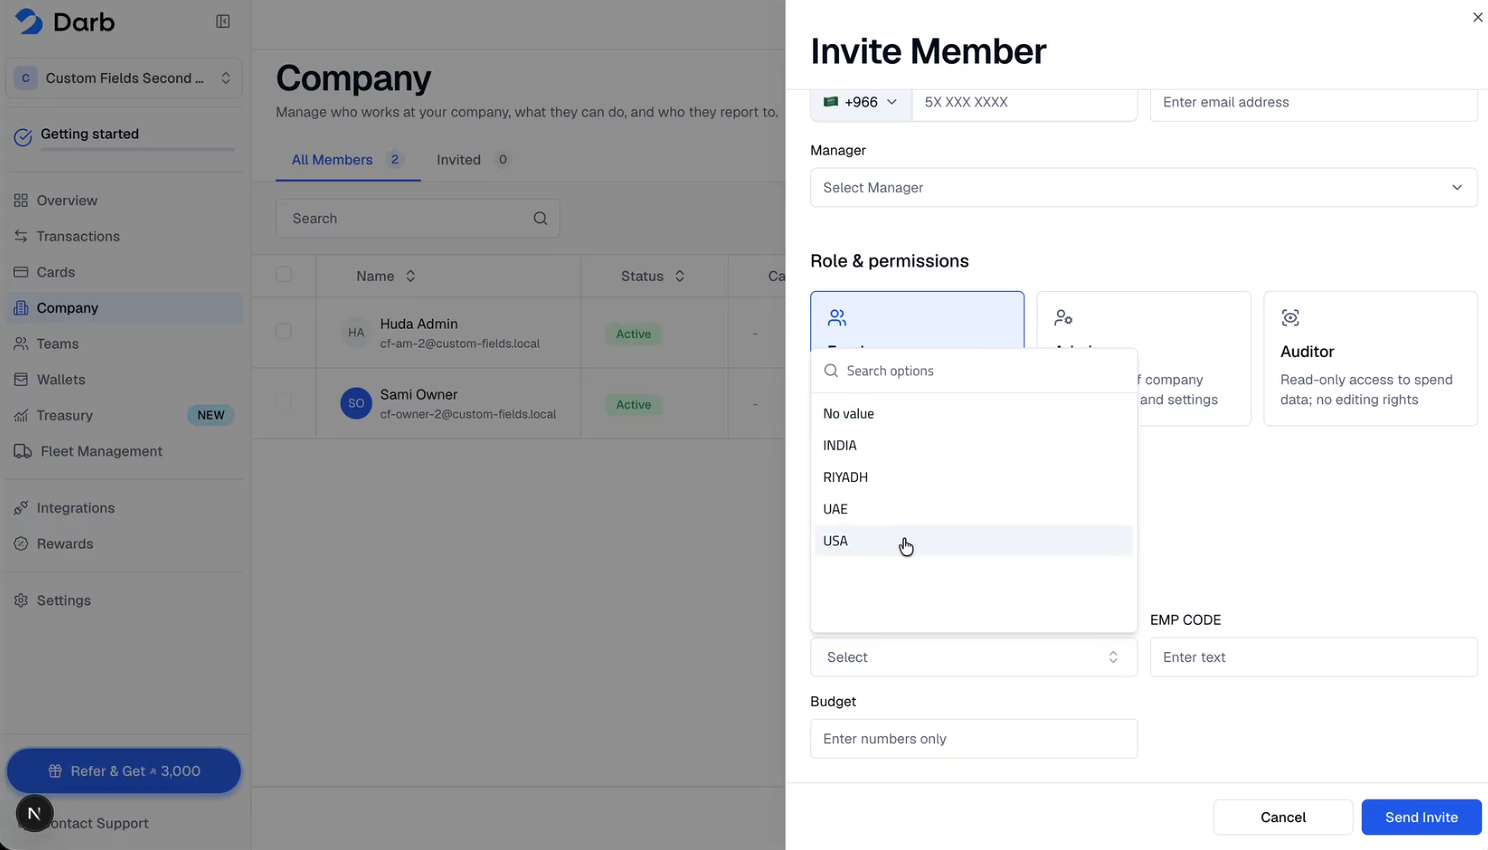
The example uses RIYADH, UAE and USA. Use your own ERP branch codes or values instead. You can use the same approach for departments, cost centres or projects assigned to employees.
Step 4: Create a text field for the ERP employee code
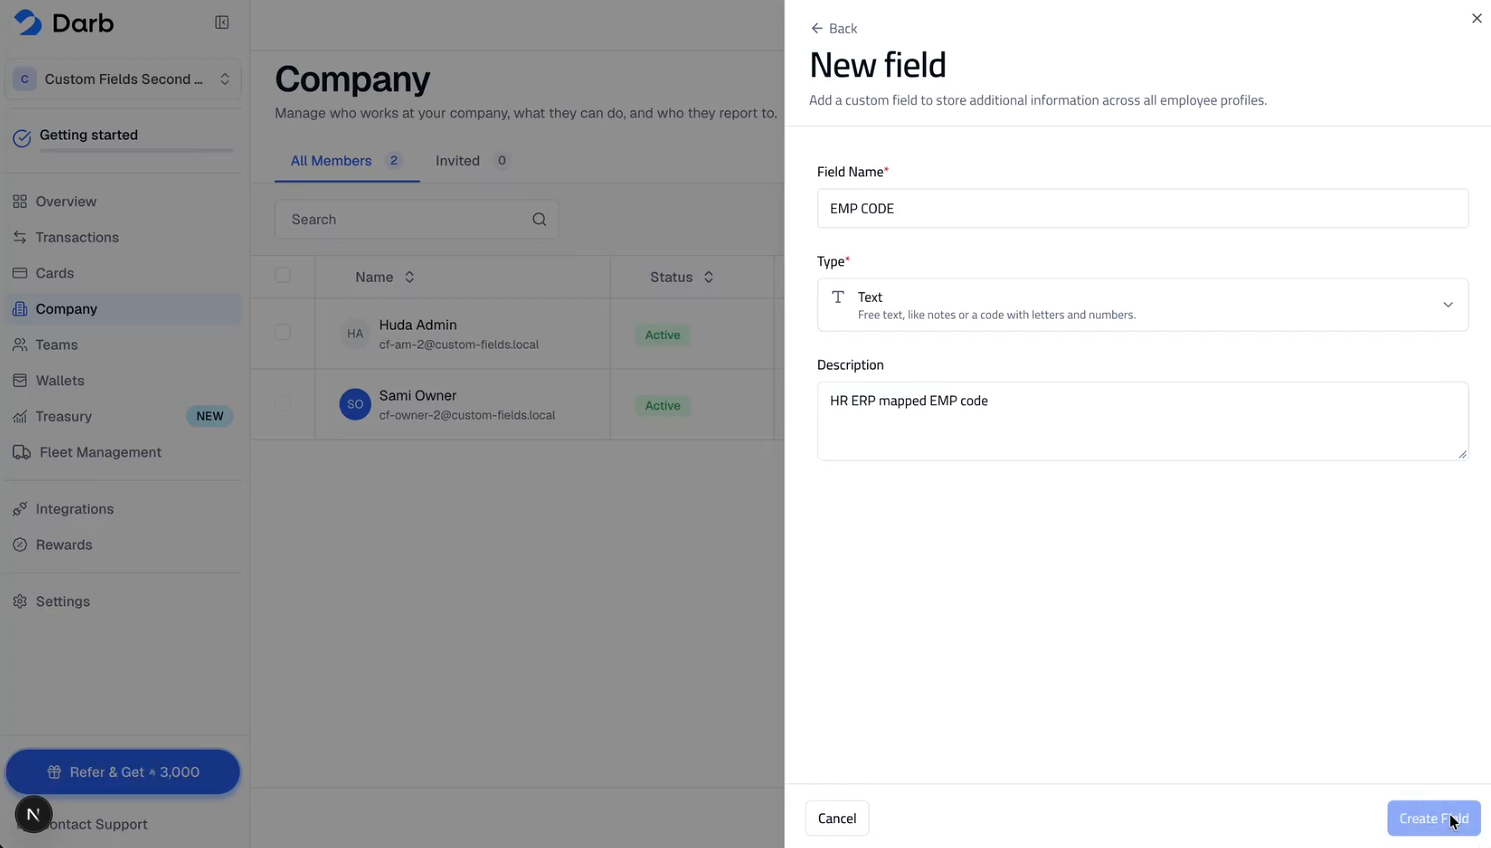
Create another field named EMP CODE and choose Text. Add a description such as “HR ERP mapped EMP code” to explain its purpose, then select Create Field. This lets you store the employee identifier used by your ERP, such as EMP001.
Step 5: Assign values to an existing employee
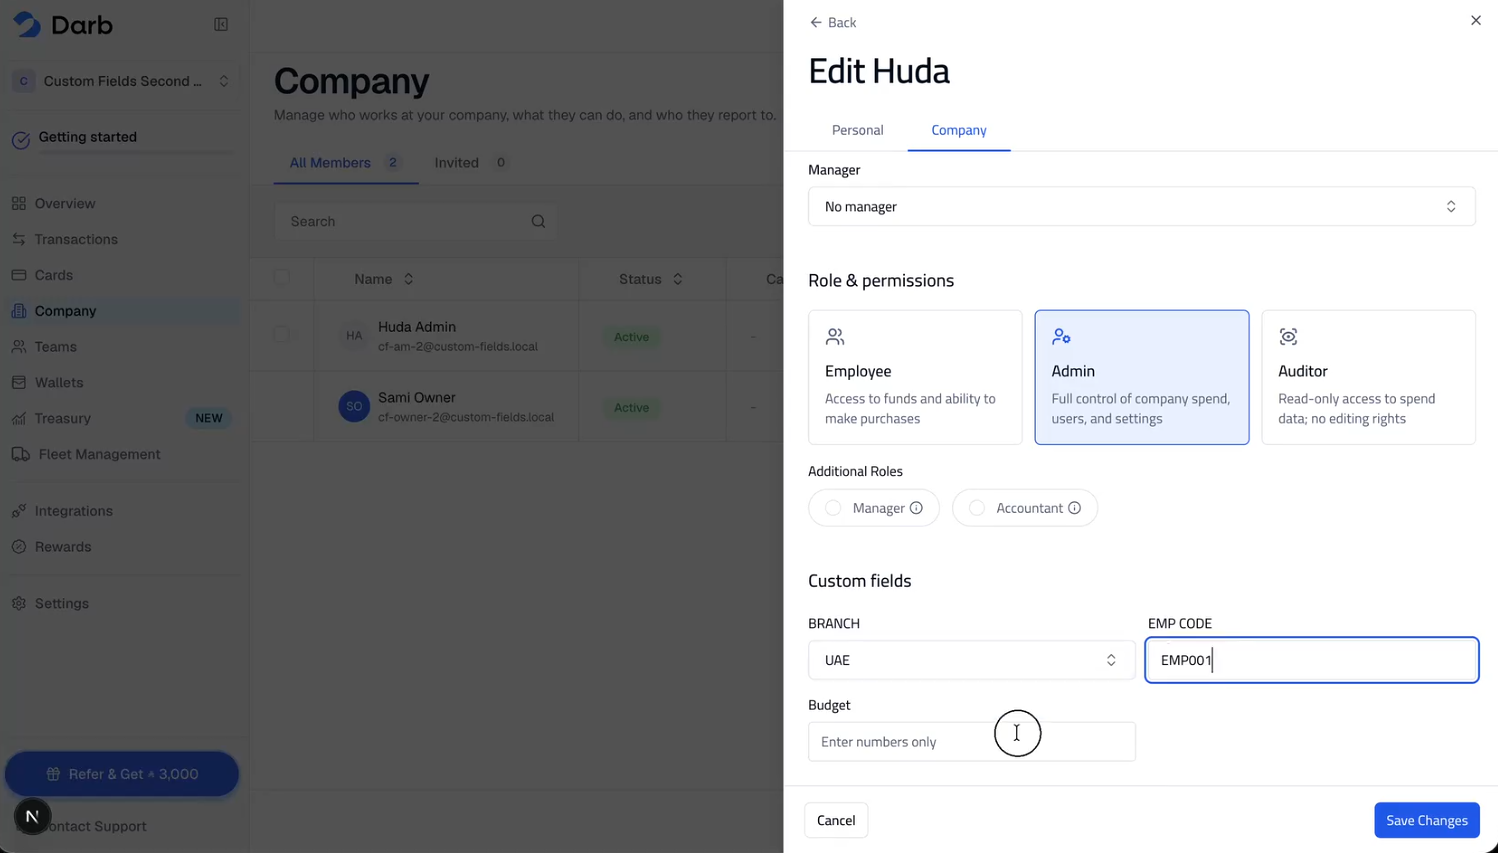
In Company, select the edit action for the employee. Open the Company tab in their profile and find Custom fields. Choose the employee's branch, enter their ERP employee code and complete any other relevant employee fields. Select Save Changes.
In the example, the employee has BRANCH set to UAE and EMP CODE set to EMP001. The numeric Budget field shown is another example of an employee custom field.
Step 6: Set values when inviting a new employee
You can also fill in employee custom fields in the Invite Member panel. Complete the invitation details, select the appropriate values from your lists, and enter any text or numeric values. Review them against the ERP record, then select Send Invite.
Check your ERP mapping before syncing
- Match each employee field to its intended ERP destination—for example, EMP CODE to the ERP employee identifier and BRANCH to the branch dimension.
- Use the exact codes and formats your ERP expects, consistently across employee profiles.
- Complete the relevant values for each employee whose data you plan to sync.
- Confirm that your integration supports the required employee fields and mapping, then check the synced result in your ERP.